Publishing your first Unity3D Game
Introduction
In this tutorial I am going to show you how to publish your first Unity3D game on Google Play Store. I will be using Android as my platform. I will walk you through the steps on how to sign your application in Unity3D and process of publishing your game on Google Play Console. This procedure is quite easy and should not be hard to grasp even for complete beginners.
1. Step Google Play Console registration
First of all, you need to register into Google Play Console using your existing google account. You will be obliged to fill some forms, accept few agreements and pay one time fee of 25 dollars. Once you have done all the tasks, you can use this account for unlimited period of time and publish unlimited number of games, applications, books etc.
2. Step Building & Signing your application
Once you have completed the develpomnet stage of your game, it is time to move on the publication process. You can start by opening
player settings in Unity3D (path - Edit/Project Settings/Player). Firstly, at the top you can see Company Name, Product Name, Default icon, ...
What you need to change:
Company Name: Create your own unique company name. It will be displayed in Google Play Store as the creator of the game.
Product Name: Again create your own unique name of the game. String should not be too long.
Default Icon: Pick the 2D texture for your game.
You can also play with other setting, but the ones above are the most important.
Now make sure that you have chosen settings for Android or whatever platform you are using, so you will not have any problems later on.
Icon
Adaptive icons: Set adaptive icon textures in your game for different resolutions.
Round icons: Set round icon textures in your game for different resolutions.
Legacy icons: Set legacy icon textures in your game for different resolutions.
If you are building your game for Android TV as well, then you can Enable Android Banner and choose the specified texture.
Resolution and Presentation
My usual setup:
Preserve framebuffer alpha: Disabled
Resolution scaling mode: Disabled
Blit type: Always
Aspect ratio mode: Native aspect ratio
Default Orientation: I usually have Auto Rotation, but this one depends on the game you are creating.
Use 32-bit Display Buffer: Enabled
Disable Depth and Stencil: Disabled
Show Loading Indicator: Don't show
Splash Image
In Splash Image Section you just have to look around, play with different effects, animations and choose your own textures for the game.
I personally set mostly these options:
Logo with Logo duration 2 sec.
Background Image
Static Splash Image which is displayed when you game is loading as well as your background image and logo if you selected one.
Other Settings
Now because here are displayed quite a lot of options, I am going to focus on those I usually change and the crucial ones. You should leave
the others in their default values or if you want to play with them you can find more information about their descriptions at the end of Step 2.
Static Batching: Enabled
Dynamic Batching: Enabled
If you want to publish your game on Google Play Store, you need to set up the following settings.
Package Name (Important): Uniquely identifies your app on the device and in Google Play Store.
The basic structure of the identifier is com.CompanyName.AppName.
Version (Important): 1.0
Bundle Version Code (Important): It is an integer number which usually starts at 1, but you can choose your own value.
Every time you make an update or release a new version of the game you must increase this number in order to determine which
version is the most recent.
Minimum API Level (Important): How many devices you want to target.
Target API Level (Important): Usually is set to Automatic
Last but not least, there is Optimization section which is very important in case you game is bigger than expected. In that case most developers
usually Preload their Assets.
Publishing Settings
Yet another quite significant part of publication process is in Publishing Settings. Here you need to create storage for your keys to games called
Keystore. Then you will create key for your game and save it in the Keystore. You must not loose your keystore, otherwise you will not be able to
update the games you published later on.
1. Create new keystore and browse a good location on your PC, so that you will not forget about it and where it will be save as well.
2. Create password for your keystore.
3. Create new key with which you can sign your game.
4. Create password for your key. It should be unique and solely for this game.
5. Select your key from Alias dropdown and confirm the password for the key.
XR Settings
Since I am not using so often Extended Reality, then I usually leave these setting be in their default values.
For more information click here:
Troubleshooting
Building apps
Android Environment Setup
Android Player Settings
Final step is to go to File/Build Settings..., making sure you have switched the right platform and clicking on Build & Run. Once it finished building your game, you will have your signed apk file which we can therefore upload on Google Play Store.
3. Step Publishing your application
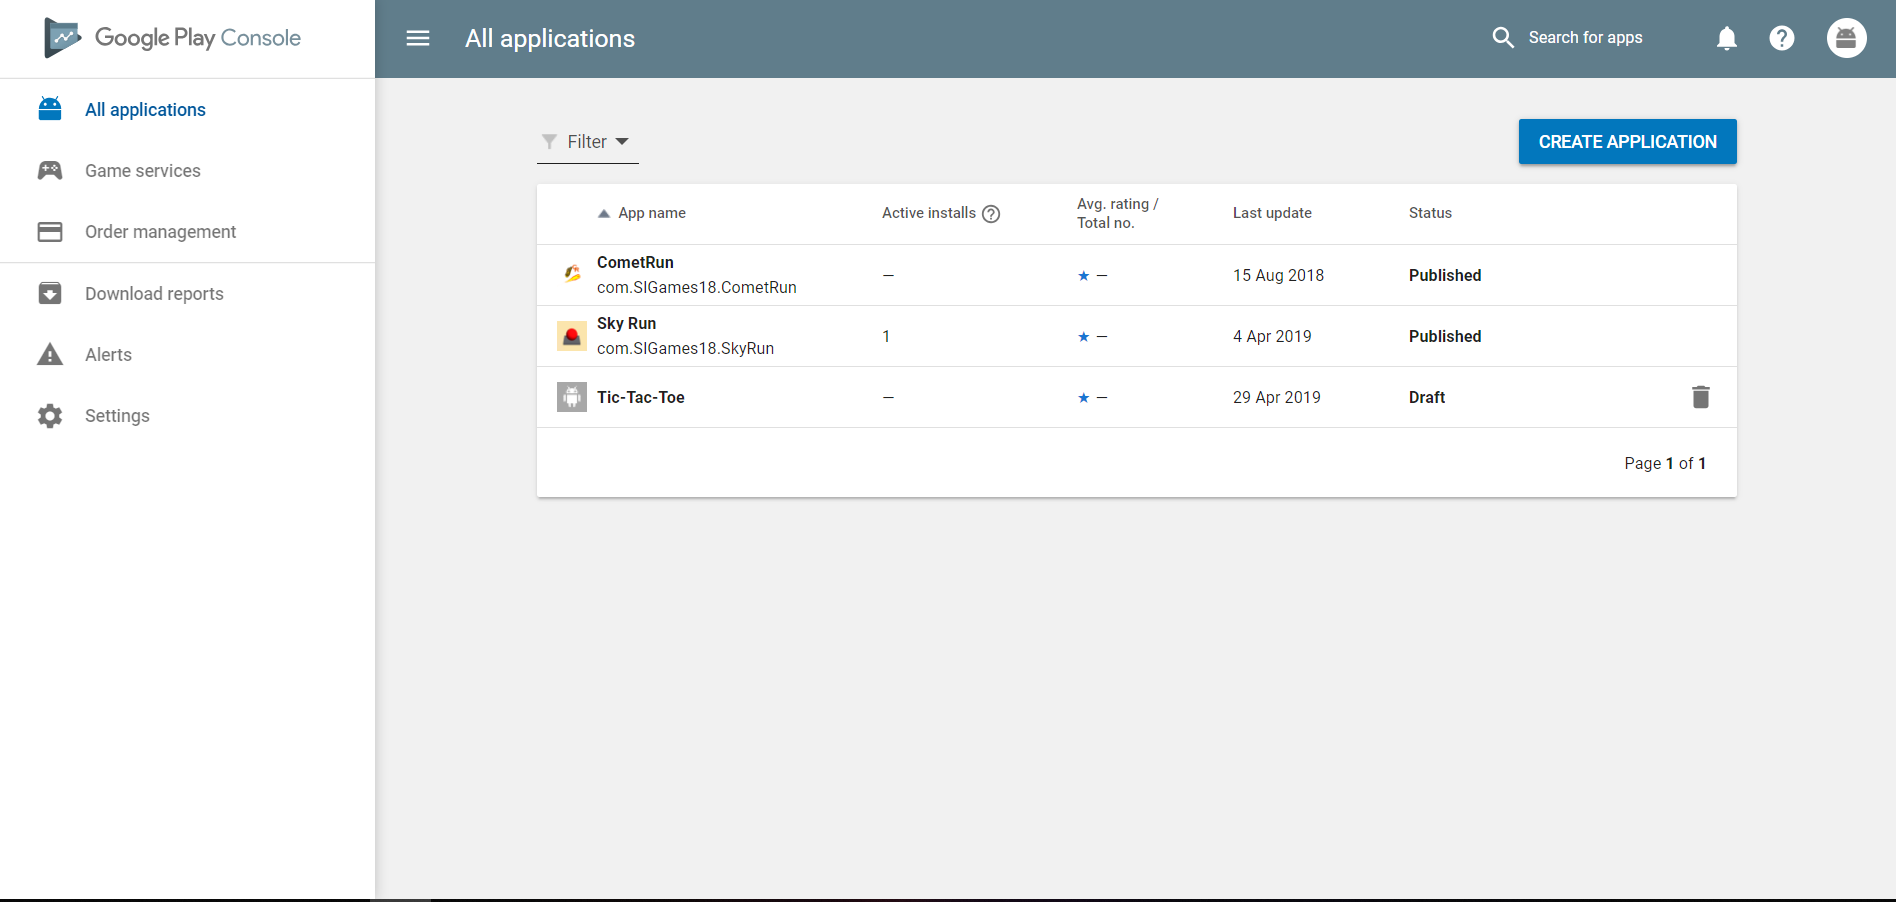
1. Click on Create Application button.
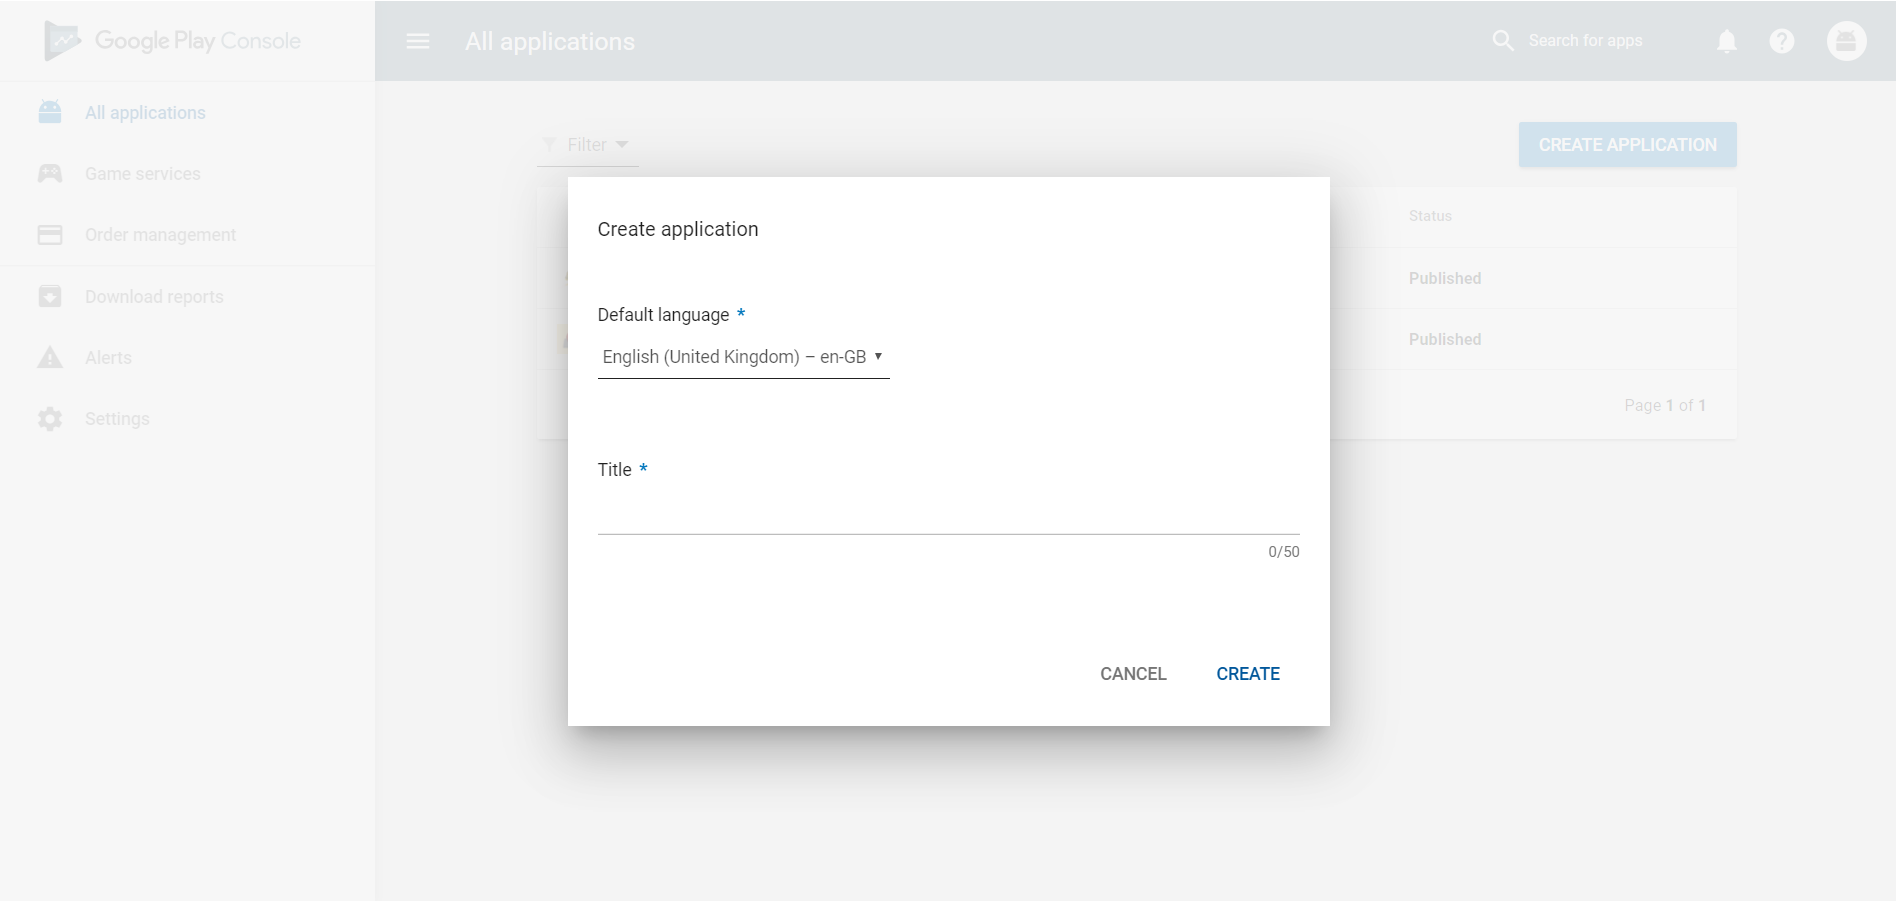
2. Choose your default language and title for your game.
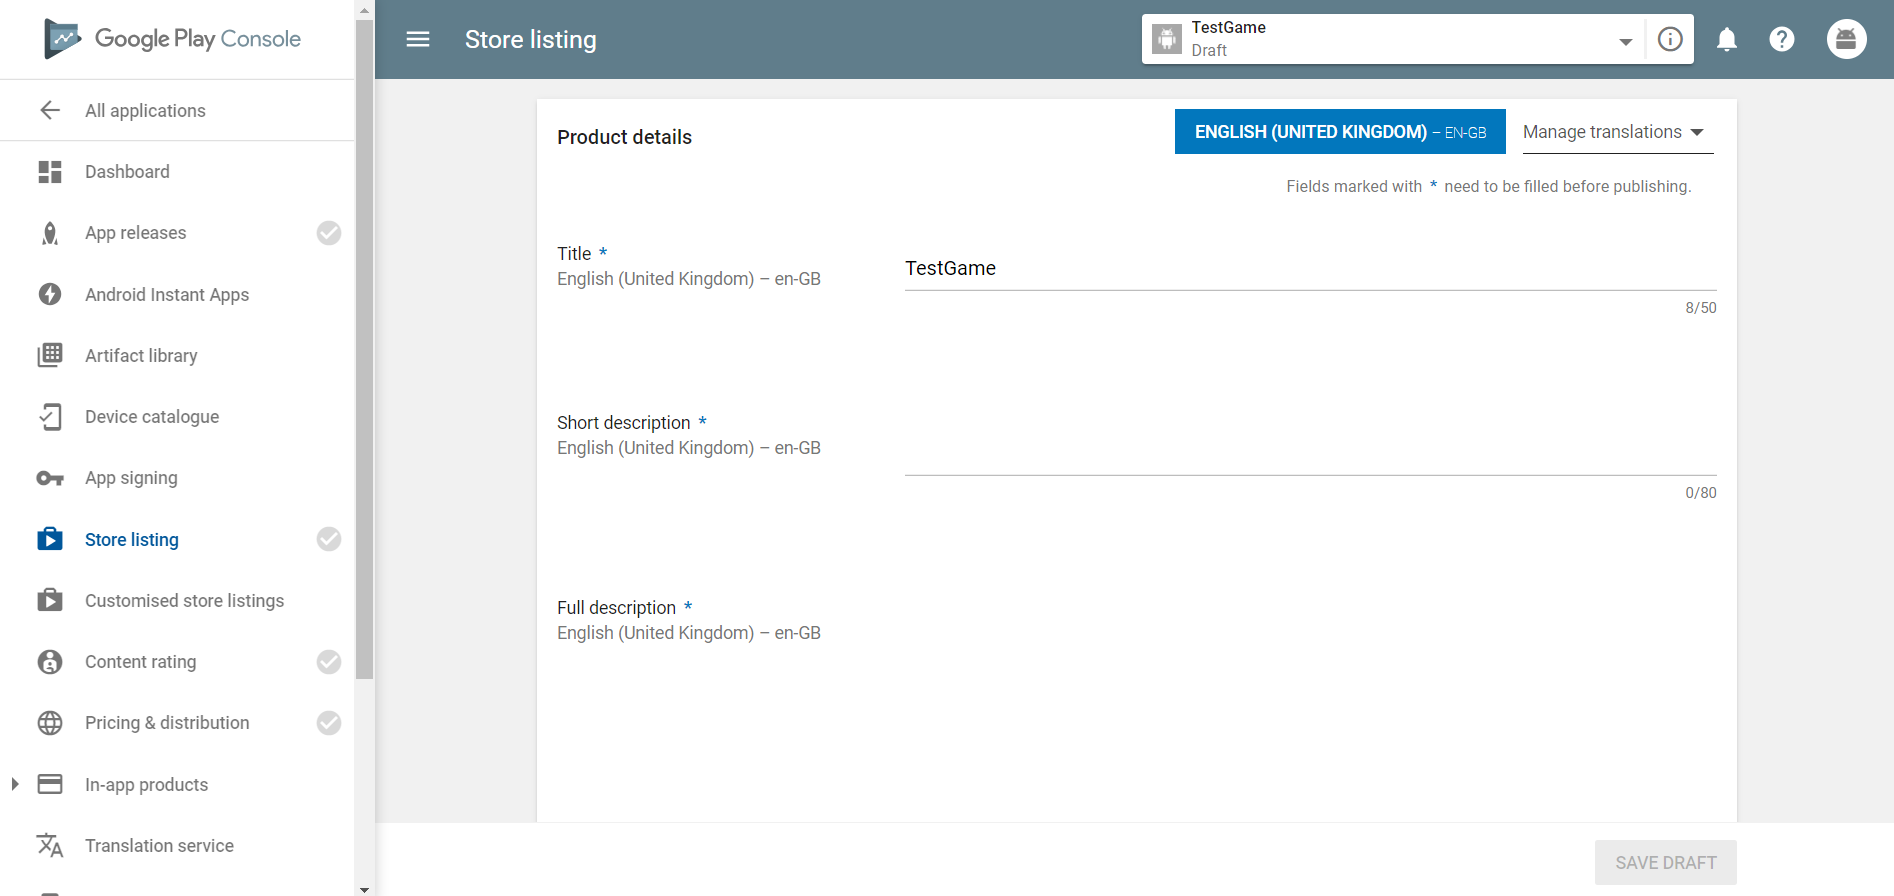
Now on the left side there is a panel out of which App releases, Store listing, Content rating and Pricing & distribution buttons are the most important. Next to them you can also see unchecked marks which must be green if you want to publish your game.
3. Go to Store listing and fill out Short and Full description of your game so that you can move on Graphic assets.
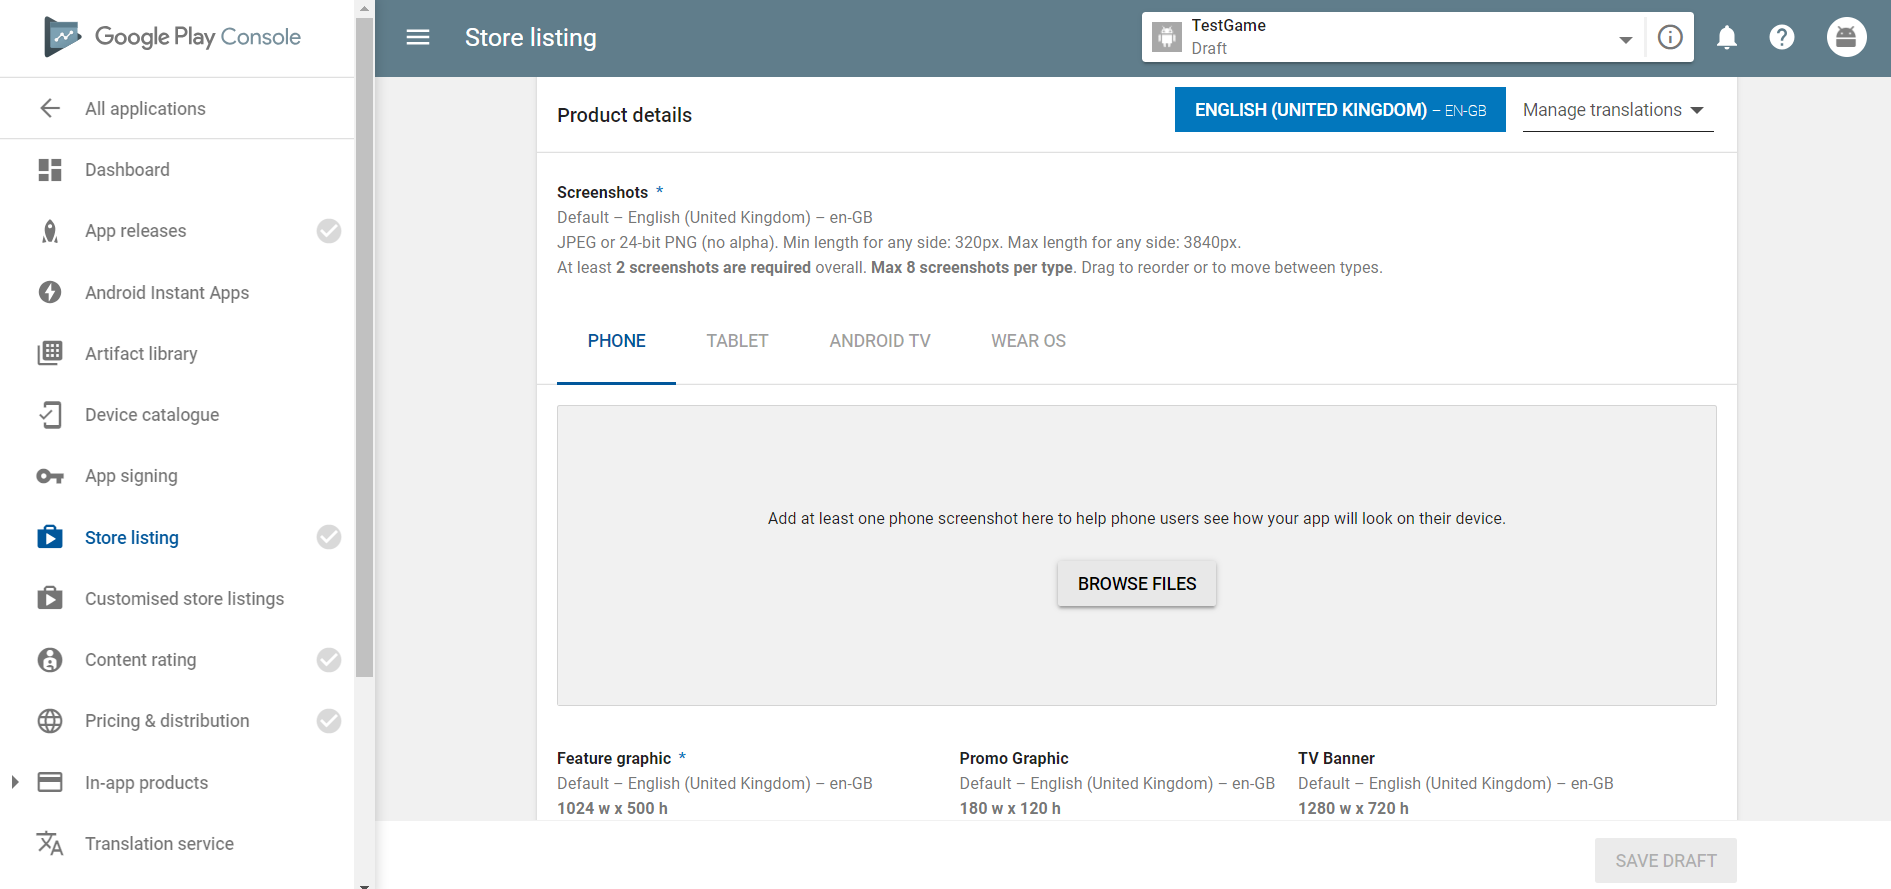
4. Graphic assets - Here you need to include Hi-res icon, Screenshots for whichever device you want (at least 2) and Feature graphic. You can see the specific size of an image below. You can also add other images, icons or videos if have some, but the one mentioned earlier are required.
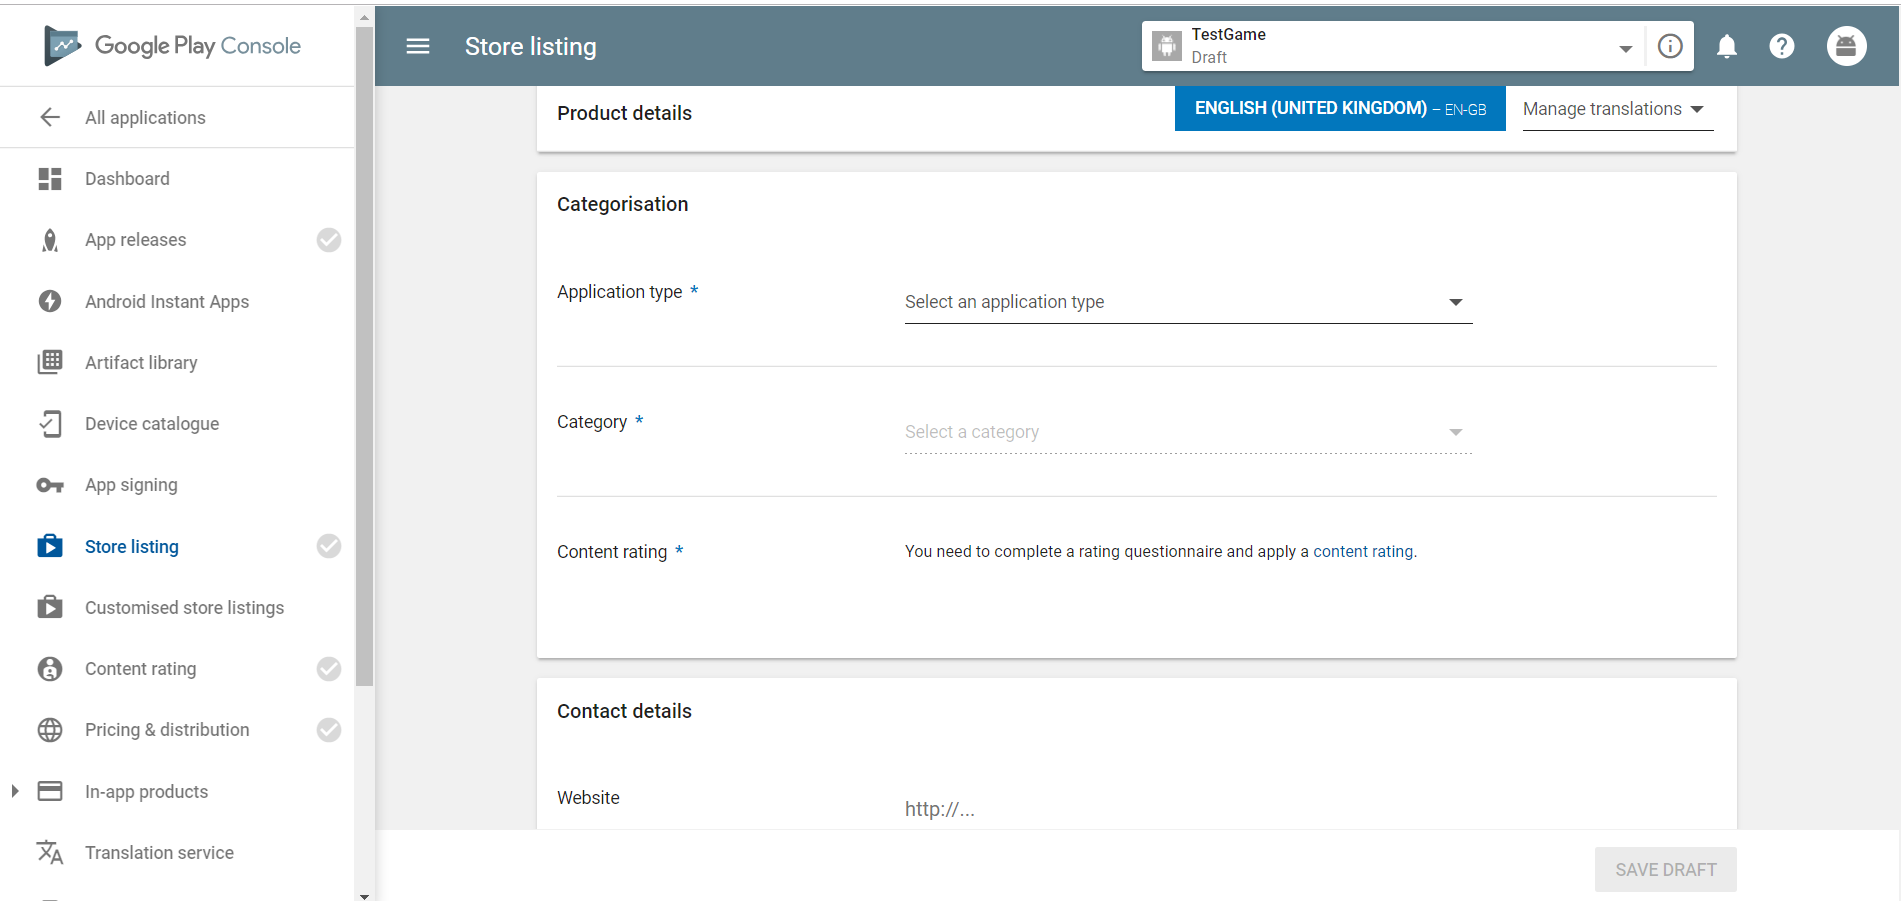
5. Categorisation - According to the game you have created fill out Application Type and Category. Then you need to rate your game, so click on Content rating that is on the left side panel. After you have answer all the questions and checked everything you will get certficate.
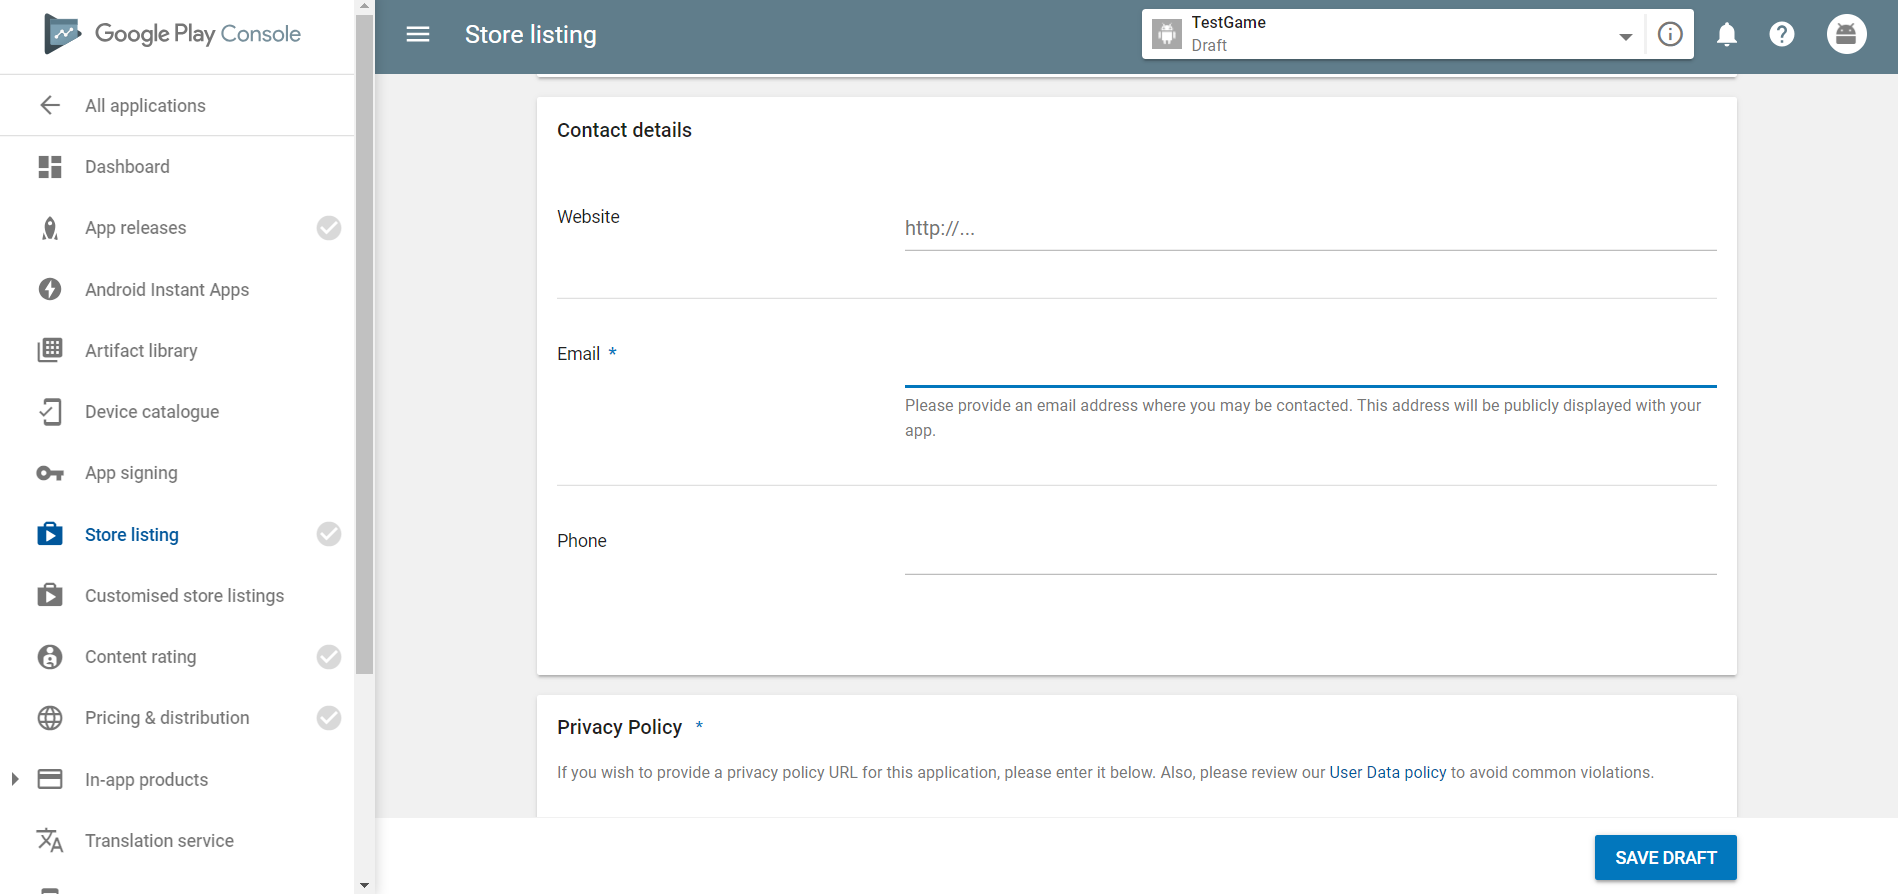
6. Contact Details - If you have your own website for the game you can add your link there, otherwise you only need to specify your email.
7. Privacy Policy - If you gather any information about user or have Personalized ads, you must add links to a Privacy Policy webpage. You
can create your Privacy Policy here and publish it on
Blogger.
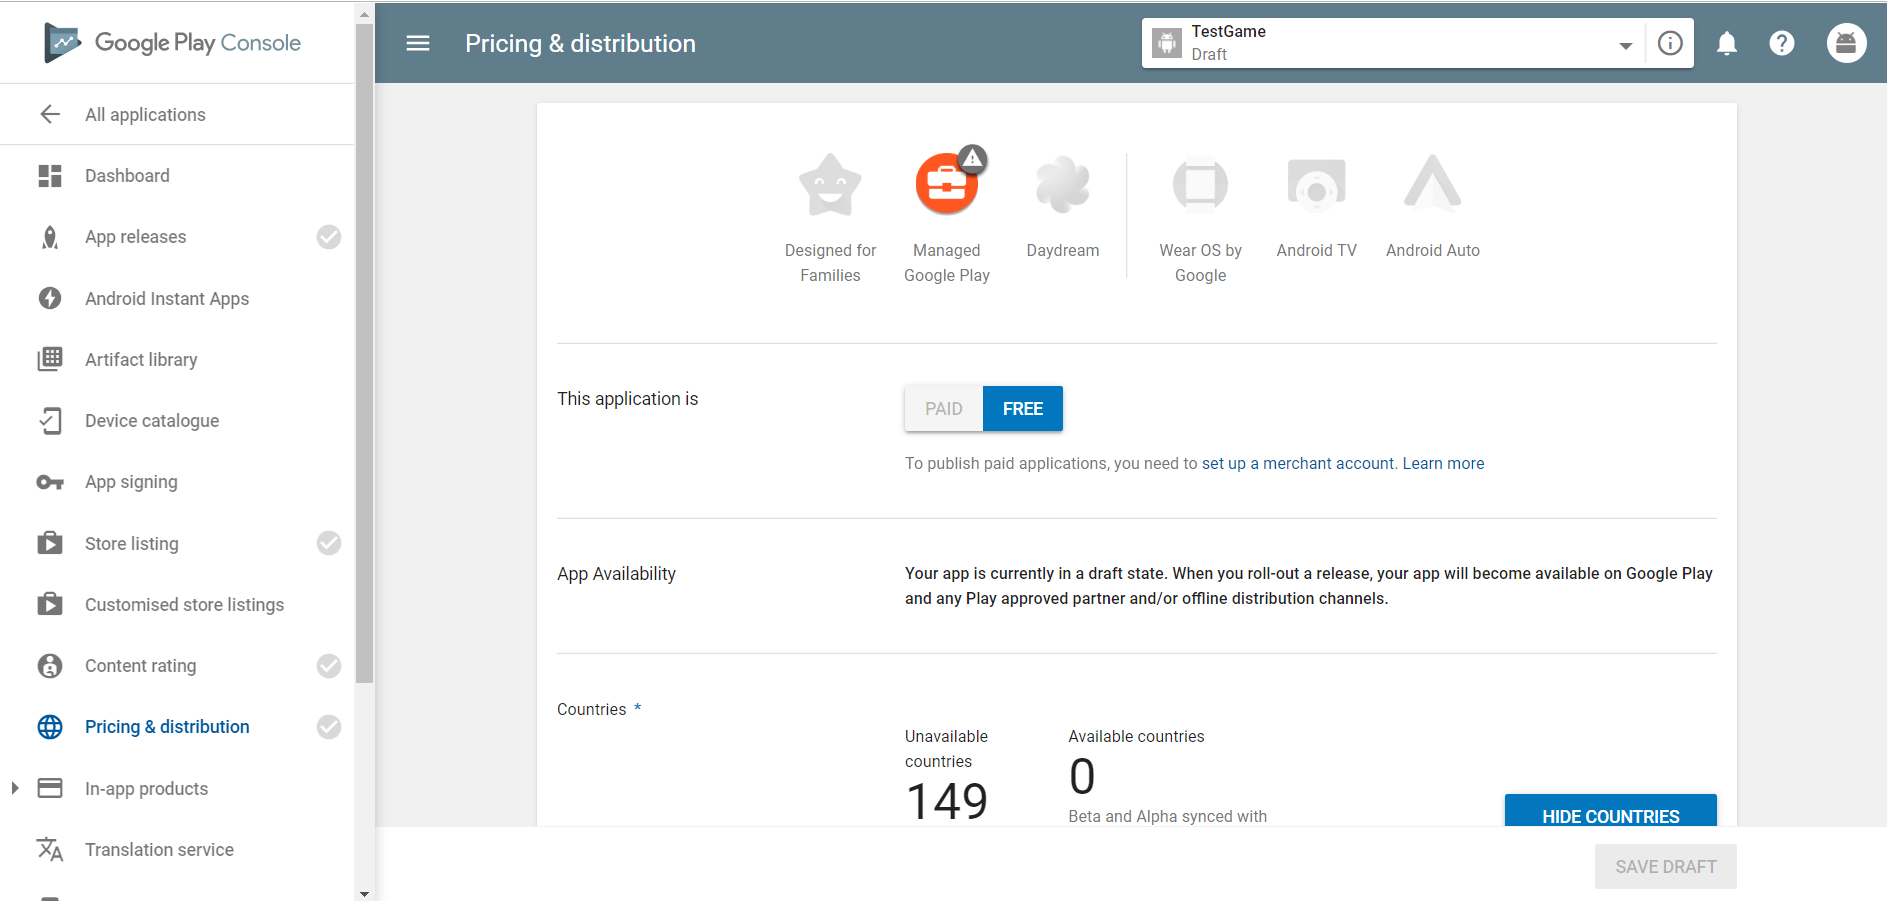
8. Pricing & Distribution - Define whether you application is paid or free and in Countries Status bar click on Available which makes your game available in the countries listed there. If you want to restrict the usage of your game in some countries, you can make it unavailable in those specific countries. Next, answer the question whether your app is Primarily Child-Directed and Contains ads. Last but not least, in the Consent section check the Consent guidelines and US export laws. Finally, save your draft, so you will not loose any changes that has been made.
By now you should have 3 out of 4 green marks. Therefore we move to our final stage, which is App release.
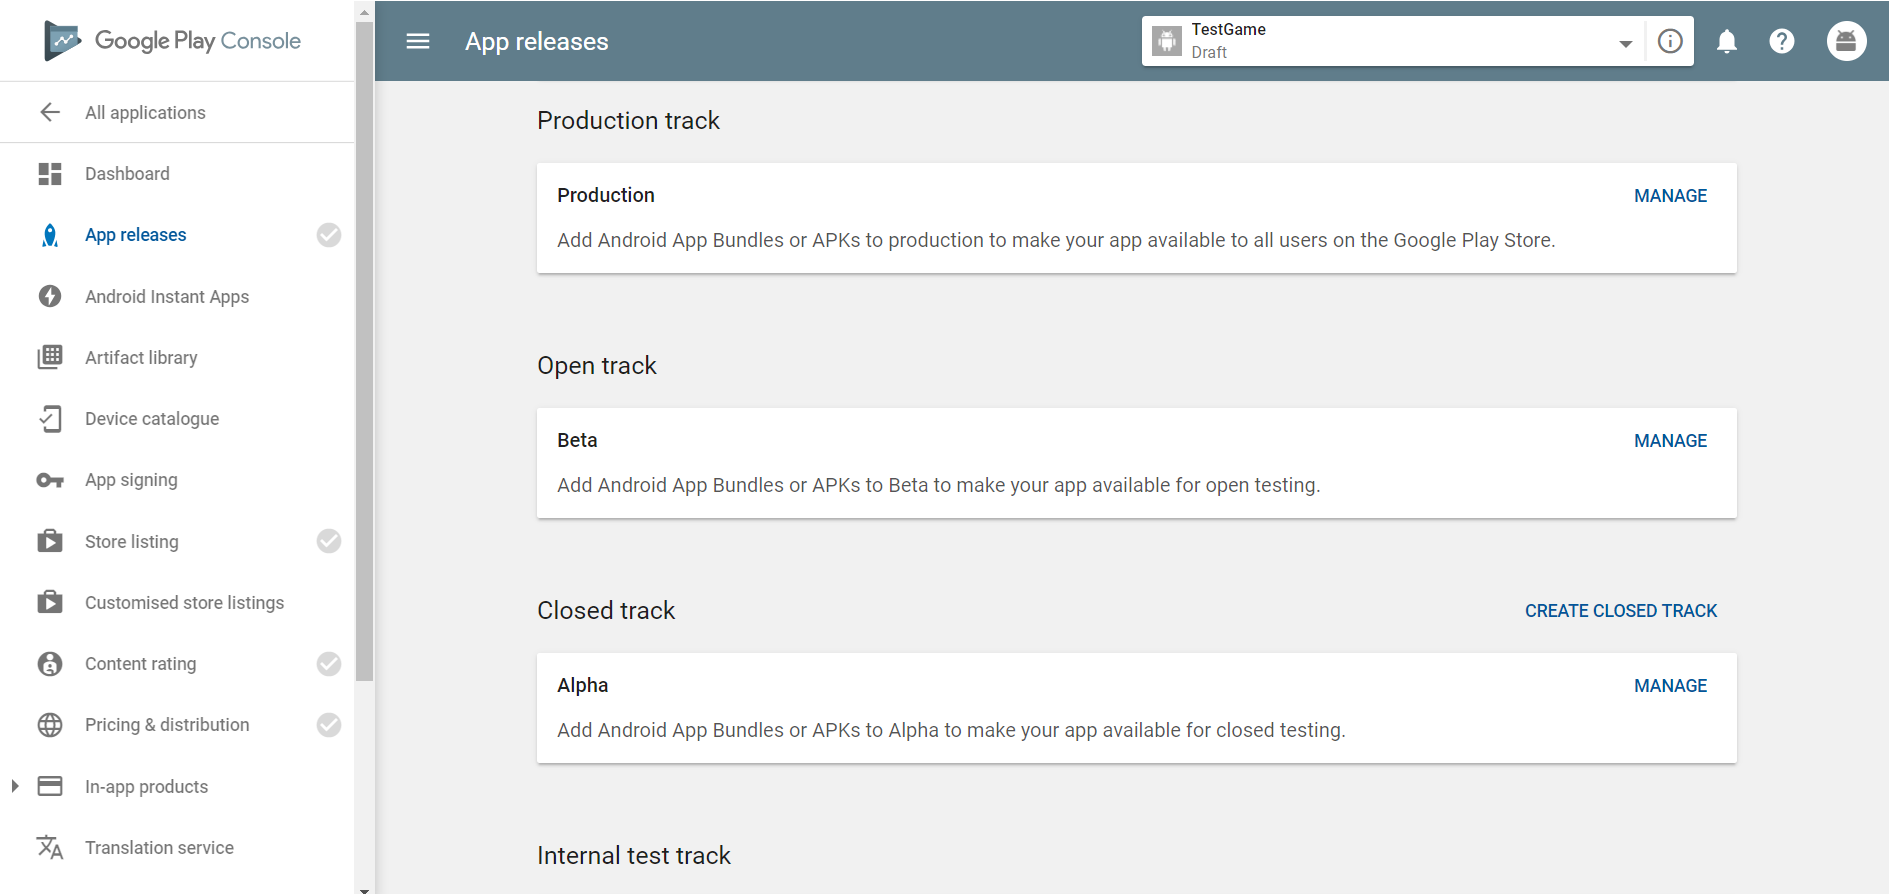
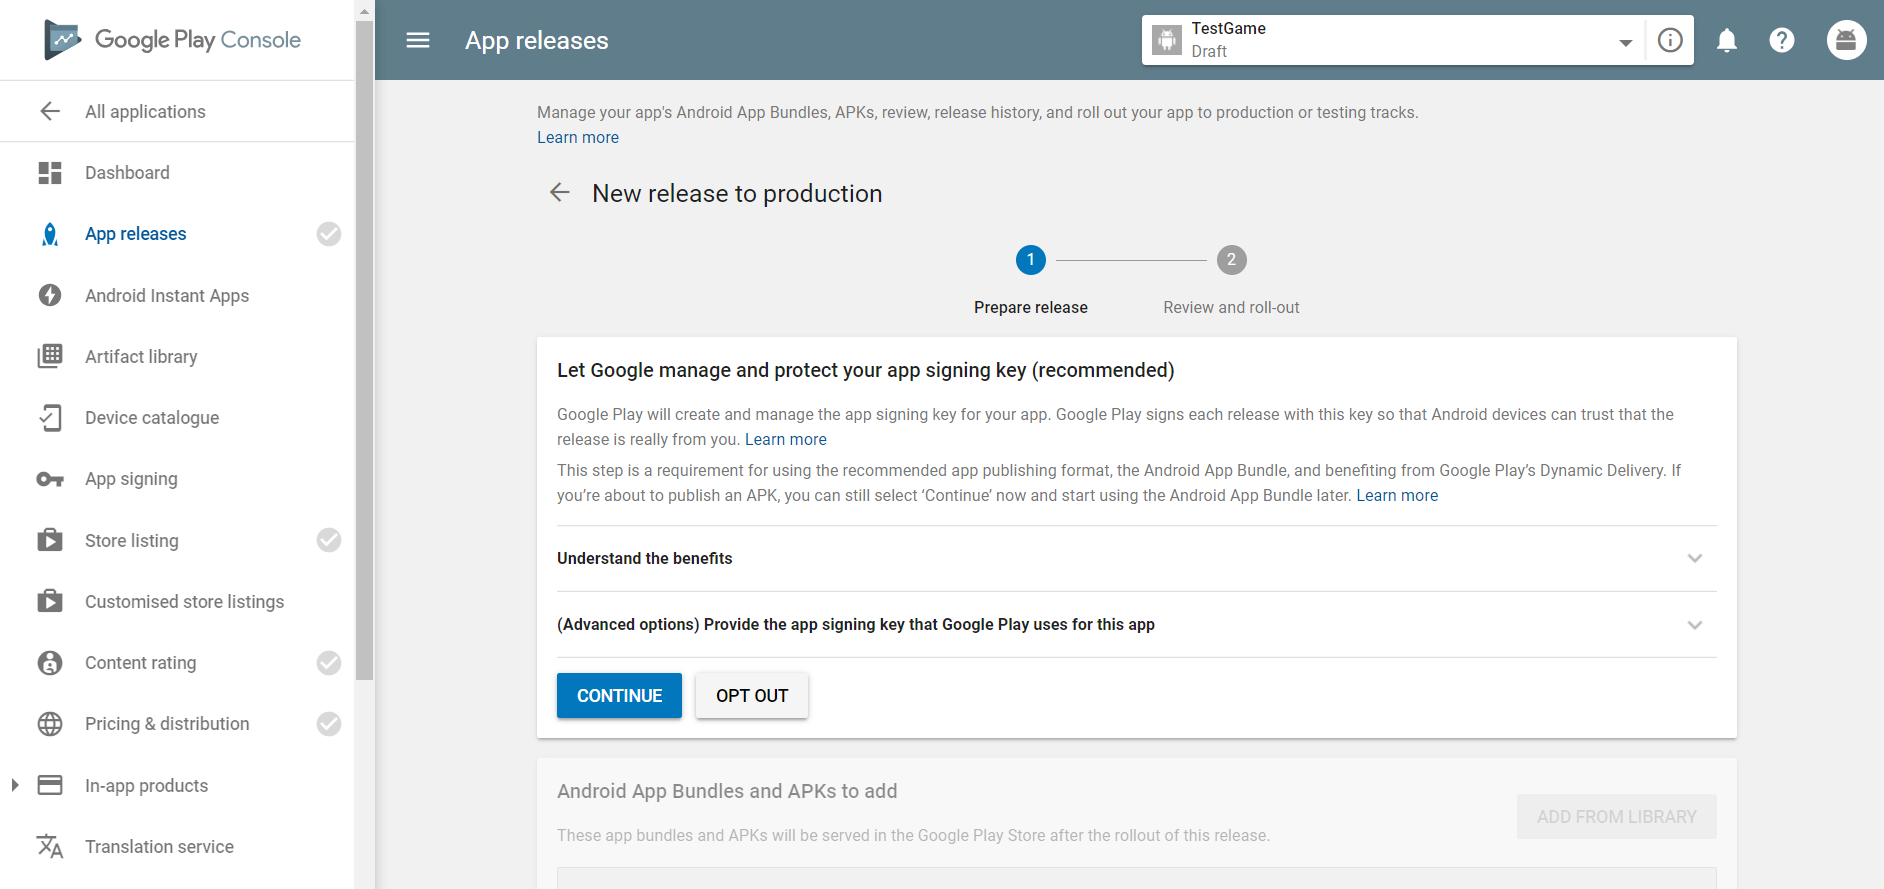
9. App releases - First of all, you need to choose the right track (Production, Beta - used for testing, ...). Then click on Create Release and Continue, so that you can upload your apk file which we have create with Unity3D earlier in this tutorial. Finally, browse and upload your apk file, enter a Release name and write what is new in this release. Click on Review and in couple of hours your game should be officially published on Google Play Store.
4. Step Updating your application
If you want to update your game, there are 2 key steps you have to follow.
1. Go to Unity3D and in Player Settings you have to update Version and Bundle Version Code. Build & Run your game again, so that you will
have your new apk file.
2. Go to Google Play Console and follow this path Release Management/App releases/Manage/Create Release. Once again upload your new apk file, write
what is new and Review. And you have updated your application.
Conclusion
I hope you have learned something new today and that this tutorial helped you move forward with your development. If you have any questions
or you have experienced some problems during publication of your game, feel free to write me an email. You can find this information in
about me section.
Date: 29.04.2019
Author: Samuel Ivan